When the late October frost blackens the squash vines and hardens the garden soil, our cellar work begins. We gather the heavy fruits and dense roots, brushing soil from our coats and knuckles, bringing hundreds of pounds of produce into the shelter of outbuildings and dry rooms. Storing these crops without refrigeration or pressurized canning requires an understanding of how plant tissues behave after harvest. Every butternut, beet, and parsnip is alive, drawing down internal starches, exhaling water vapor, and resisting rot through the integrity of its skin.
Dry storage does not mean parching our harvest until it shrivels, nor does it mean leaving everything in open slatted baskets. Squash demand dry, temperate air to keep mold from penetrating their rinds, while root vegetables will turn flaccid within twelve days if exposed to that same dry air. To keep both through the lean months of February and March, we manage two distinct microclimates within the home pantry and root cellar: one crisp and ventilated for the cucurbits, and one cool, muffled, and damp for the tubers and taproots.
Curing Stems and Skins Under Mild Heat
Before any winter squash or pumpkin enters long-term storage, its rind must undergo suberization. This is the biological process where damaged surface cells form a thick layer of suberin, a waxy compound that seals out fungal spores and prevents moisture loss. At harvest, we take hand pruners and clip each stem at least two to three inches from the fruit. Snapping the stem off by hand leaves an open, jagged wound that invites black rot (*Didymella bryoniae*) straight into the seed cavity.
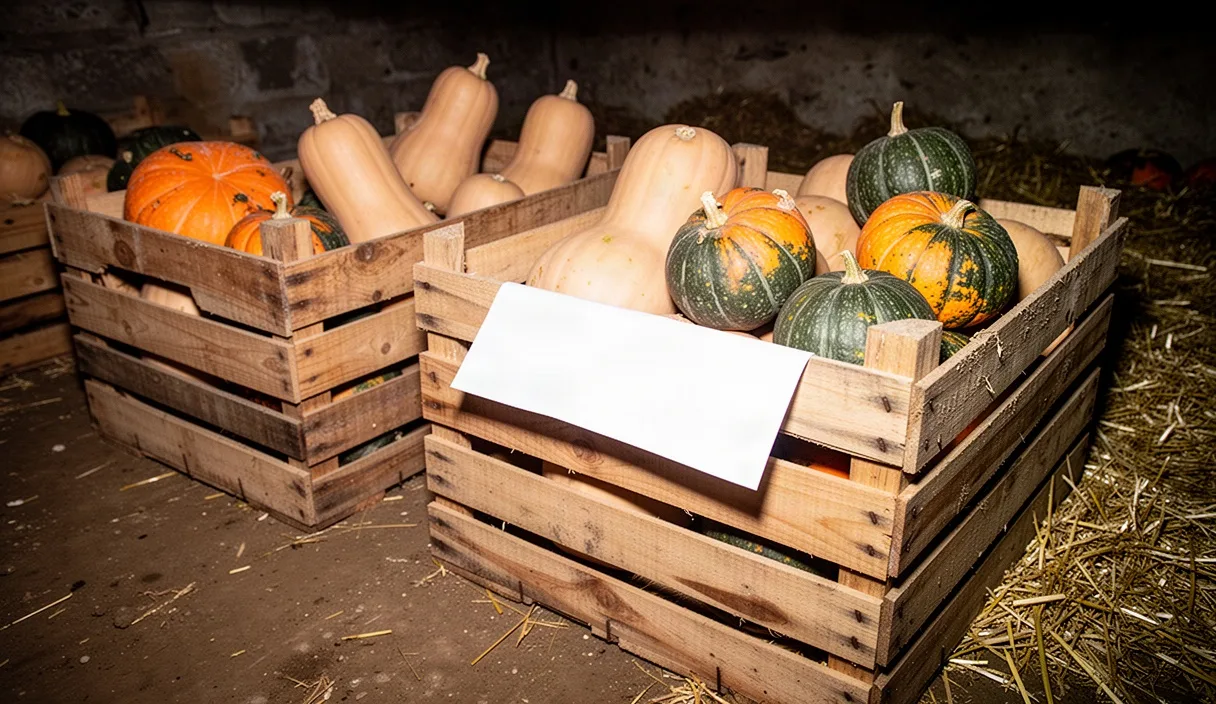
We arrange the harvested squash in a single layer across raised wooden racks, making sure no fruit touches its neighbor. The ideal space for this initial phase provides a temperature between 80 and 85 degrees Fahrenheit with a relative humidity of roughly 80 percent, accompanied by continuous airflow. A warm porch, a greenhouse shaded with burlap, or a small room heated with an oil-filled radiator serves well. Over the course of 10 to 14 days, the soft rind hardens against thumbnail pressure, small fingernail scratches heal over, and the fleshy green stem dries into a hard, woody cork.
Not all cucurbits benefit from identical curing schedules. Certain varieties lose quality if kept warm for too long, while others require heat to reach their best flavor profile:
- Butternut (Moschata): Requires the full 10 to 14 days of curing. The skin shifts from pale green-streaked tan to a uniform matte buff, and the internal starches begin converting into sugars.
- Hubbard and Kabocha (Maxima): Possess thick skins that dry into tough shells. They tolerate 10 days of warm curing and keep their dense texture longest when the stem turns gray and bone-dry.
- Acorn and Delicata (Pepo): Do not cure under high heat. Warm air degrades their thin rinds, turning tender skins stringy and accelerating decay. We wipe them clean and place them directly into cool storage at 55 degrees Fahrenheit.
Segregating High-Humidity Roots from Dry Cucurbits
The central challenge of winter food preservation lies in reconciling opposing environmental demands under one roof. A room dry enough to keep squash free of surface mold will suck moisture from carrots and parsnips within two weeks. Conversely, the humid atmosphere required by beets and turnip roots will rot a squash stem in short order. We cannot place them on adjacent shelves and expect both to survive until spring.
Winter squash demand an ambient relative humidity between 55 and 65 percent, paired with temperatures between 50 and 55 degrees Fahrenheit. If temperatures drop below 48 degrees, squash suffer chilling injury, leading to watery internal breakdown and rapid mold colonization. Roots, by contrast, demand near-freezing temperatures, between 33 and 38 degrees Fahrenheit, along with a relative humidity of 90 to 95 percent. They evolved underground, surrounded by damp earth, and have no waxy outer cuticle to retain moisture once pulled.
| Crop Category | Storage Temperature | Relative Humidity | Expected Shelf Life |
|---|---|---|---|
| Butternut Squash | 52 to 56 F | 60 to 65 percent | 4 to 6 months |
| Kabocha / Hubbard | 50 to 55 F | 55 to 65 percent | 5 to 7 months |
| Carrots and Beets | 33 to 38 F | 90 to 95 percent | 4 to 5 months |
| Parsnips and Rutabagas | 32 to 36 F | 90 to 95 percent | 5 to 6 months |
| Onions and Garlic | 34 to 40 F | 60 to 68 percent | 6 to 8 months |
To solve this separation issue without building two separate outbuildings, we designate high shelves in a warm basement corridor or unheated spare bedroom for squash, where household heat keeps the air dry and tempered. The roots stay downstairs in the coolest corner of the masonry basement or outdoor earth cellar, insulated against dry house air inside packed storage boxes.
Packing Carrots and Beets into Sand Bins
To give root vegetables the near-saturated humidity they need without rotting them in stagnant water, we turn to the traditional sand box. Sand serves as a porous thermal mass. It cushions the roots, excludes ambient light that triggers green sprouting, and holds a minute film of water while allowing excess respiratory carbon dioxide to escape.
We harvest roots on a dry afternoon. We pull them gently by hand, twist or cut off the green leafy tops about one-half inch above the crown, and leave the long taproot intact. Never wash roots destined for sand storage; water introduced at harvest softens the skin and spreads bacterial soft rot (*Pectobacterium carotovorum*). Instead, let the harvest sit in crates for two hours until the exterior soil dries to dust, then brush it away with a coarse horsehair brush or bare hands.
- Select the Medium: Use clean, washed builder's sand or masonry sand. Avoid ocean sand, which contains salts that desiccate produce, and avoid heavy garden topsoil, which carries dormant fungal spores and packs too tightly.
- Test the Moisture: The sand must feel barely damp to the touch, similar to potting soil straight from a fresh bag. If you squeeze a handful, it should hold its shape without dripping a single drop of water. If it crumbles completely into loose dust, spray it lightly with water from a garden rose and mix it thoroughly.
- Lay the Base: Pour two inches of conditioned sand into the bottom of a heavy wooden chest, galvanized metal wash tub, or food-grade plastic crate. If using plastic, drill four 1/4-inch drainage holes in the floor to prevent water from pooling at the base.
- Place the First Tier: Arrange carrots, beets, or turnips flat along the sand bed, leaving roughly one finger's width between each root. Roots that touch can spread rot to their neighbors if an individual skin fails.
- Bury and Repeat: Pour an inch of sand over the layer, working it into the gaps with your fingers so every root is completely surrounded. Lay down another tier of roots, staggered across the gaps of the layer below. Finish with two inches of sand over the top tier to seal out the room air.
Monitoring Ambient Room Ventilation and Moisture
Storage spaces are not static chambers; they breathe, react to outdoor barometric swings, and shift as seasonal temperatures plunge. A room left completely sealed will develop stagnant pockets where moisture released by the vegetables collects against cool masonry walls, forming condensation droplets that trigger fungal blooms. Air must move, but it must move deliberately, without creating drafts that wither the produce.
We place two instruments in every storage area: a mechanical bimetal dial or digital hygrometer, and a minimum-maximum thermometer. Hang these at vegetable height, roughly three to four feet off the floor, rather than at eye level where the air is warmer. We check them twice weekly during early winter. If the squash room climbs above 68 percent relative humidity, we crack a window or open a door vent for twenty minutes on a dry afternoon to introduce crisp outdoor air.
For cellar spaces containing our sand boxes, passive airflow maintains the balance. A low intake pipe pulling air from the shaded north side of the foundation paired with a high exhaust flue on the opposite wall creates a convective siphon. In sub-zero weather, close these vents almost entirely using wooden slide dampers to prevent the floor temperature from falling past the freezing mark. A frozen beet breaks down into mush the moment it thaws.
Inspecting Stems for Early Softness
Rot is an active predator in the winter pantry, and it nearly always begins at the stem. When we walk the aisles of our storage shelves, our eyes scan the peduncle, the corky socket where vine joined fruit. A squash skin can appear bright and flawless while the internal tissue around the stem cap is collapsing into mold.
Every ten to fourteen days, we handle the fruit. We gently press a bare thumb directly against the corky stem and the rind immediately encircling it. If the wood gives way, feels spongy, or yields a sour, fermented odor, that fruit has broken dormancy and must be removed immediately. Do not discard it without assessment: if the rot is confined strictly to the exterior stem, slice the neck off immediately, roast the clean flesh, and freeze the puree. Leaving that squash on the rack for another five days will produce white mycelial mats that release spores onto every adjacent squash.
We check root bins by reaching down along the inside corners of the sand crates, where humidity concentrates first. Pull a sample carrot or parsnip from the lower middle layer. The root should snap crisply under tension, like a fresh twig. If it bends like rubber, the sand medium has run too dry, and the stack requires a light, gentle misting across the top surface. If the root feels slippery or displays dark, sunken lesions, unearth that layer, cull the compromised roots, and repack the sound ones in fresh, drier sand.
Common Mistakes
- Washing Roots Before Storage: Scrubbing skins strips away natural protective microflora and drives water into tiny microscopic cracks, almost guaranteeing mold outbreaks within four weeks.
- Storing Apples Near Cucurbits: Apples, pears, and ripening fruit emit significant volumes of ethylene gas. Ethylene accelerates senescence in squash, causing skin yellowing, stem detachment, and flesh decay. Keep fruit cellars completely separate from vegetable pantries.
- Leaving Fruits on Bare Concrete: Concrete pulls moisture from air and wicks cold directly from the ground. Storing squash directly on a concrete floor creates a cold spot on the bottom rind where condensation forms. Always set fruits on slatted pine shelves, cardboard, or untreated straw.
- Trimming Squash Stems Flush: Cutting the stem flush with the fruit shoulders removes the natural protective barrier. The hollow or porous vascular ring is exposed directly to room air, allowing pathogens direct entry into the flesh.
Practical Next Steps
Begin your storage preparation before harvesting your main crop. Construct or source slatted wooden crates from clean, untreated pine or spruce, avoiding pressure-treated boards that release chemical residues into enclosed rooms. Collect two bags of clean, coarse masonry sand and bring them indoors so the sand reaches ambient temperature before your harvest arrives.
Inspect your proposed storage quarters with an accurate thermometer throughout a week of late-autumn weather. Map the temperature swings between floor level and ceiling to identify your microclimates: the highest, warmest shelf for the butternuts, and the cold, draft-free floor corner for the packed root boxes. By matching each vegetable's living biology to the right physical material and environment, your pantry will provide firm, nourishing food well into the lengthening days of spring.