When we pull an unfinished hardwood board from the bench or unpack a freshly milled slab of maple, the timber carries an honest, dry rasp beneath the fingers. Raw wood in the kitchen is alive to its surroundings. It breathes in ambient moisture during humid summer mornings and sheds it beside the winter radiator. Left untreated, a plain wooden board quickly shows the strain of kitchen labor: onion juices soak into the pale fibers, knife edges tear dry cell walls, and repeated sink rinses leave the timber parched, fuzzy, and prone to splitting along the glue lines.
Mineral finishes and synthetic coatings have their place in cabinetry, but a cutting surface demands something intimate, food-safe, and repairable. We turn to pure beeswax combined with a carrier oil. Wax provides a semi-permeable, water-repellent barrier that settles into the tracheids and vessels of the wood without hardening into a brittle surface skin. When properly blended and worked deep into the pores, a beeswax butter halts deep water absorption, softens the impact of sharp carbon steel blades, and restores the rich, muted color of raw timber.
Wood Species and Water Vulnerability in the Kitchen
Every tree species handles water differently based on how its vascular network developed while growing. Diffuse-porous hardwoods, such as sugar maple (hard maple) and American beech, feature microscopic pores distributed evenly throughout the annual growth rings. These timbers absorb moisture slowly and uniformly, making them traditional favorites for heavy butcher blocks. Ring-porous timbers, such as red oak, possess open, barrel-like earlywood vessels that act like tiny drinking straws. If you wash an unfinished red oak board, water wicks deep into the internal grain within seconds, carrying bacteria and moisture that take days to evaporate.
End grain surfaces present the highest risk of water failure. An end-grain cutting board orientates the vertical straws of the tree upward toward the knife. While this orientation preserves knife edges by allowing the blade to slide between fibers rather than cutting across them, it exposes raw capillary tubes directly to meat juices and wash water. Face grain and edge grain boards expose the long walls of the fibers, which resist rapid capillary absorption but remain vulnerable to surface checking and cupping if one side stays wet while the other dries in the air.
| Wood Species | Pore Architecture | Water Absorption Rate | Maintenance Cadence |
|---|---|---|---|
| Hard Sugar Maple | Diffuse-porous, tight structure | Low to moderate | Every 5 to 6 weeks |
| Black Walnut | Semi-diffuse-porous, medium vessels | Moderate | Every 4 weeks |
| Black Cherry | Diffuse-porous, very fine texture | Low | Every 6 weeks |
| White Oak | Ring-porous, closed by tyloses | Low to moderate | Every 4 to 5 weeks |
| Yellow Birch | Diffuse-porous, small pores | Moderate to high | Every 3 to 4 weeks |
White oak behaves differently from red oak because its pores are naturally plugged with tyloses, which are balloon-like outgrowths that prevent fluid travel. This makes white oak resistant to rotting, though its high tannin content can react with iron knives and wet surfaces to create dark blue-black stains. Knowing the wood species dictates how heavily we must dose the timber with our wax compound and how vigilant we must be after slicing wet produce like tomatoes or carving resting poultry.
Melting Pure Beeswax with Food-Grade Oil
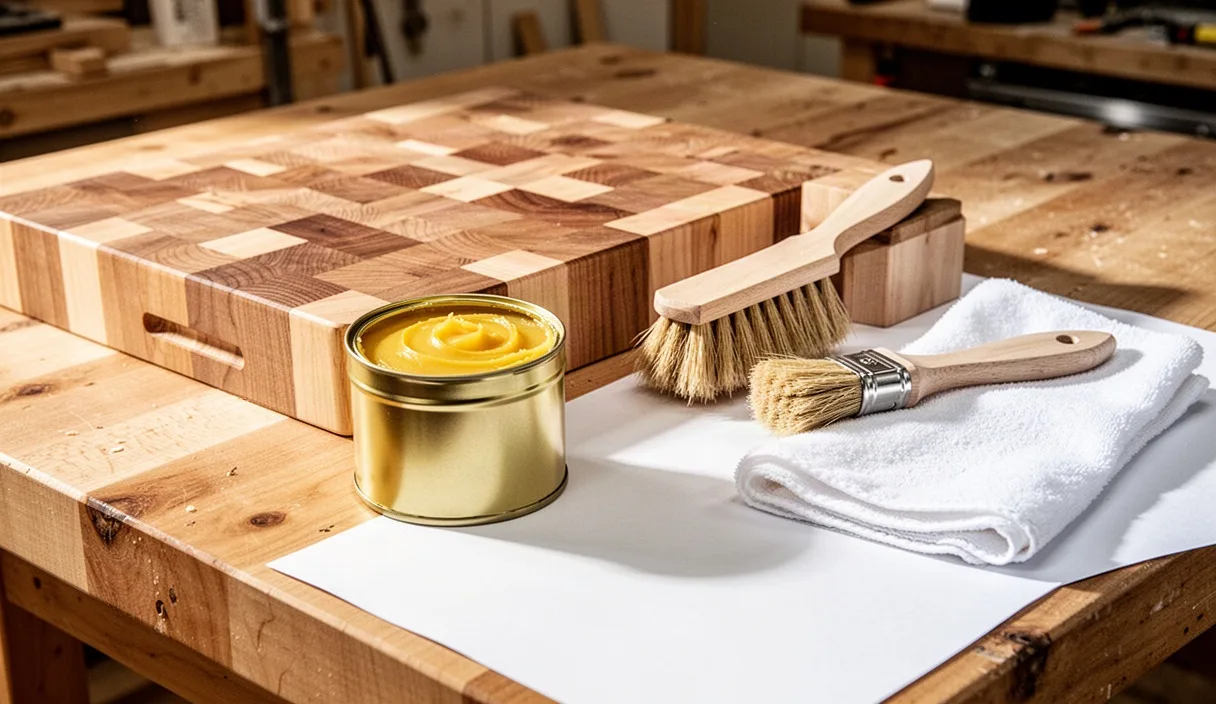
Pure beeswax at room temperature is too rigid to spread across raw timber. It cakes on the surface without soaking into the fibers. To make it pliable, we melt the wax into a neutral, shelf-stable carrier oil to create a paste often referred to in the workshop as board butter or wood spoon salve. The ratio we rely on is one part beeswax to four parts oil by weight, measured on a kitchen gram scale. For instance, 60 grams of yellow cappings wax combined with 240 grams of oil yields a soft, creamy pomade that melts readily under the friction of your bare hand.
For the carrier oil, choose highly refined food-grade mineral oil or pure fractionated coconut oil (medium-chain triglyceride oil, or MCT). Standard culinary vegetable oils like corn, soy, canola, or extra virgin olive oil should never be used on cutting boards: their unsaturated fats oxidize over time, leaving the board sticky and smelling rancid. If you prefer an all-botanical finish and have no nut sensitivities in your household, raw, cold-pressed Swedish walnut oil can serve as the carrier, as it dries naturally through polymerization over several weeks without spoiling.
To prepare the mixture safely, set up a simple double boiler:
- Place a heatproof glass jar or a clean metal tin inside a wide saucepan filled with two inches of water.
- Set the stove burner to medium-low heat. Beeswax melts between 62 and 65 degrees Celsius (144 to 149 degrees Fahrenheit). Never place wax directly over an open flame or high electric heat, as it can ignite if it reaches its flash point near 204 degrees Celsius.
- Drop solid wax pellets or thinly shaved wax blocks into the jar. Shaving the wax with an old cabinet scraper or utility knife speeds up melting considerably.
- Once the wax liquifies into a clear, golden syrup, pour in the room-temperature carrier oil slowly while stirring with a clean wooden dowel or chopstick. The mixture will cloud temporarily as the cold oil meets the warm wax; continue gentle heating until the blend clarifies completely.
- Remove the container from the water bath and allow it to cool undisturbed at room temperature. As it cools, it will firm up into an opaque, buttery salve.
Cleaning Boards Naturally Before Wax Treatment
Applying wax over a soiled, wet, or grease-stained board traps debris inside the wood pores. Before any treatment, the board must be mechanically cleaned, sanitized without harsh chemistry, and dried to equilibrium. Never immerse a board in a sink full of soapy water, and never run it through a household dishwasher. The sustained immersion and high heat dissolve the glue joints, swell the wood cells unevenly, and cause severe warp or deep perimeter splits.
Begin by scraping away compacted food residues with a stiff metal bench scraper held at an 80-degree angle, pulling along the direction of the grain. If the surface feels rough from previous washings, the grain has likely raised. You can knock these loose, microscopic fibers flat by running a dry sheet of 320-grit silicon carbide sandpaper lightly along the grain. Wipe away all sanding dust with a dry cotton cloth before introducing moisture.
To deep-clean without chemicals, scatter a handful of coarse kosher salt or sea salt across the board face. Cut a fresh lemon in half and use the cut side as a scouring pad, pressing firmly to release juice while working the abrasive salt crystals in small circular motions. The citric acid cuts through surface oils while the salt scrubs the hollows of the grain without gouging the wood. For stubborn odors like garlic, mix a paste of three parts baking soda to one part water, rub it across the surface, let it sit for six minutes, and scrape it off.
Rinse the board using a damp sponge and warm tap water, keeping the water contact under thirty seconds. Wet both sides equally, even if you only prepped food on one side, to equalize internal moisture stress and prevent the wood from cupping. Immediately wipe the board dry with a waffle-weave towel. Stand the timber on its edge, propped against a wall or resting in a slotted drying rack, for at least sixteen hours before applying wax. The wood must be thoroughly dry to the touch; trapping moisture beneath a fresh layer of beeswax invites mildew inside the grain.
Working the Warm Salve into Open Grain Fibers
When the timber is dry, clear your work table and lay down a clean sheet of kraft paper or heavy linen. The room should ideally be warm, around 21 degrees Celsius, as cold timber causes the wax mixture to seize on contact before it can penetrate. If your board feels cold, you can warm the wood gently using a handheld hair dryer set to low heat, sweeping the nozzle twelve inches above the face for two minutes.
Scoop a walnut-sized dollop of the wax butter directly onto the wood. Using a pad of coarse unbleached cotton, washed denim, or your bare palms, begin working the salve into the grain. The natural heat from your hands softens the beeswax instantly, turning the paste into an oil-slick glaze. Push the paste deep into the timber using tight, overlapping circles. Pay close attention to knife scars, small fissures, and dry gray patches, packing the mixture into every opening.
Address the edges and particularly the end grain. Because end grain wood behaves like a bundle of open straws, it will pull in salve at three to four times the rate of the broad face. Apply repeated layers to the top and bottom cut ends until the wood stops absorbing the grease instantly and maintains a wet, glossy film on the surface. Once both faces, all four sides, and any routed finger grooves are coated, leave the board resting on edge on two small blocks of wood. Let the timber rest for at least four hours, or ideally overnight, allowing the carrier oil to draw the dissolved wax components deep into the cell cavities.
Buffing to a Silky Water-Repellent Sheen
After the resting period, the board will look dull, slightly cloudy, and feel greasy to the touch. The wood has taken in all the liquid it can hold, leaving excess wax solids sitting on the outer surface. If you skip buffing, this excess wax will shear off during food preparation, sticking to damp dough or gathering under vegetable skins.
Fold a clean, dry piece of heavy cotton duck canvas, flannel, or terry cloth into a tight hand-sized pad. Begin buffing the board vigorously, running straight along the direction of the wood grain. Your goal here is friction: the heat created by brisk rubbing softens the high spots of the surface wax, burnishing them into a hard, microscopically thin sheet while the cloth lifts away all residual grease.
Keep flipping the cloth to an unsoiled fold as it fills with paste. Continue buffing until the greasy drag disappears under your hand, replaced by a cool, glass-smooth texture. When you run dry fingertips across the face, they should glide without leaving oily fingerprints or catching on rough grain. Test your work by flicking a few droplets of water from your fingertips onto the center of the board. The water should bead tightly into tall, round domes that roll freely across the surface without spreading out or darkening the wood beneath. Wipe the test droplets dry with a rag, and your board is ready for the prep station.
Common Mistakes in Board Waxing
Small missteps in timing or material choice can undo hours of careful wood preparation. Here are the issues we encounter most frequently:
- Applying wax over wet timber: Sealing a board that has not dried for a full day traps internal water. This causes the wood beneath the wax to rot slowly, leading to a sour smell and permanent gray-black mildew streaks in the grain.
- Using unrefined culinary oils: Reaching for vegetable oils from the pantry always leads to rancidity. The fats decompose inside the porous wood structure, tainting the flavor of cut food with a stale, bitter taste that requires deep sanding to remove.
- Neglecting the underside: Waxing only the working face of the board creates an imbalance in vapor exchange. The untreated bottom absorbs humidity while the top repels it, pulling the board into a pronounced curve or cupping warp over a single season.
- Overheating the wax during melting: Boiling beeswax or heating it rapidly alters its chemical structure, turns the wax dark brown, and destroys the delicate honey scent. Always melt slowly over a low water bath.
- Leaving heavy surface wax without buffing: Slapping on salve and leaving it thick creates a sticky, tacky layer that attracts kitchen dust, hair, and flour, making sanitation nearly impossible.
Practical Next Steps for Your Workspace
A cutting board requires routine attention rather than a one-time cure. To keep your work surface in serviceable shape for years of daily chopping, establish a steady rhythm of assessment and minor upkeep in your kitchen.
Mix a half-pint jar of board butter following the four-to-one oil-and-wax ratio, label it clearly, and store it alongside your kitchen linens away from direct sunlight. After every few washings, monitor how the wood reacts to water. When water droplets no longer bead up into tall spheres but instead spread out and flatten against the wood, or when the rich color begins to fade into an ashen, dry tone, set aside an evening for re-waxing. For a board used daily, a quick swipe of salve every four weeks keeps the timber sealed and stable.
If your board develops deep knife gouges, cracks that harbor moisture, or an uneven rock on the counter due to accidental warping, hand maintenance may need to pause for workshop intervention. In those cases, consult an experienced woodworker to flatten the timber on a jointer or sand it flat on a wide-belt machine before restarting your natural beeswax regimen.