In our kitchen, sharpening a knife is not a chore to rush through before dinner. It is a quiet maintenance ritual that roots us to the tools we handle every day. When we place a carbon steel gyuto or a stainless paring knife against a wet abrasive stone, we are engaging with basic physics: friction, pressure, and the microscopic geometry of hardened steel. A dull knife crushes plant cell walls, bruising delicate herbs, weeping juices from onions, and tearing through raw proteins. A keen edge, cut cleanly down to a width of mere fractions of a micron, slices by separation rather than force.
Water stones provide an immediate tactile dialogue that mechanical sharpeners and pull-through gadgets can never replicate. Through our fingertips, we feel the exact moment the bevel meets the grit, the drag of the abrasive mud, and the soft pop of a collapsing wire burr. Working by hand takes patience, but the muscle memory develops naturally with practice. By learning how to shape, refine, and strop an edge on simple blocks of bonded mineral and water, we take full responsibility for the lifespan and performance of our kitchen cutlery.
Selecting Whetstone Grit Progressions for Kitchen Edges
Every stone progression depends on the state of the steel before us. Whetstones are categorized by grit ratings, which correspond to the size of the abrasive particles suspended within the binder. In our workshop, we classify these stones into three distinct categories: coarse repair stones, medium sharpening stones, and fine polishing stones. Using a stone that is too fine to repair a dull knife wastes hours and yields mediocre results, while using an overly coarse stone on a slightly tired edge removes valuable steel unnecessarily.
For routine maintenance of an edge that still cuts paper but struggles on tomato skin, we begin on a medium stone. A 1000-grit synthetic stone is the workhorse of kitchen sharpening. It cuts fast enough to establish a new apex in twenty to thirty passes per side, yet leaves teeth fine enough for kitchen tasks. If the blade has visible nicks or a rounded, blunt apex, we drop down to a coarse stone between 320 and 500 grit to establish the primary geometry before moving upward.
| Grit Rating | Micron Particle Size | Primary Kitchen Purpose | Typical Water Stone Type |
|---|---|---|---|
| 300 to 500 | 35 to 45 microns | Repairing small chips, thinning primary bevels | Coarse ceramic or silicon carbide |
| 800 to 1200 | 12 to 15 microns | Setting the cutting apex on neglected edges | Medium aluminum oxide |
| 2000 to 4000 | 4 to 8 microns | Refining the scratch pattern for general prep | Fine ceramic splash-and-go |
| 5000 to 8000 | 1.5 to 3 microns | Mirror polishing edges for raw fish and meat | Hard vitrified finishing stone |
For general kitchen preparation involving vegetables, poultry, and crusty bread, stopping at 3000 to 4000 grit is ideal. This level of finish retains microscopic serrations along the blade edge. These microscopic teeth catch and bite through slick vegetable skins like peppers and tomatoes. If we push a chef knife to an 8000-grit mirror polish, the blade becomes razor-like for push-cutting raw fish, but it often slips across waxier produce. We reserve our highest grits for specialized slicing knives, while our daily prep blades remain on a crisp 2000 to 3000 grit finish.
Soaking Stones and Building an Abrasive Slurry
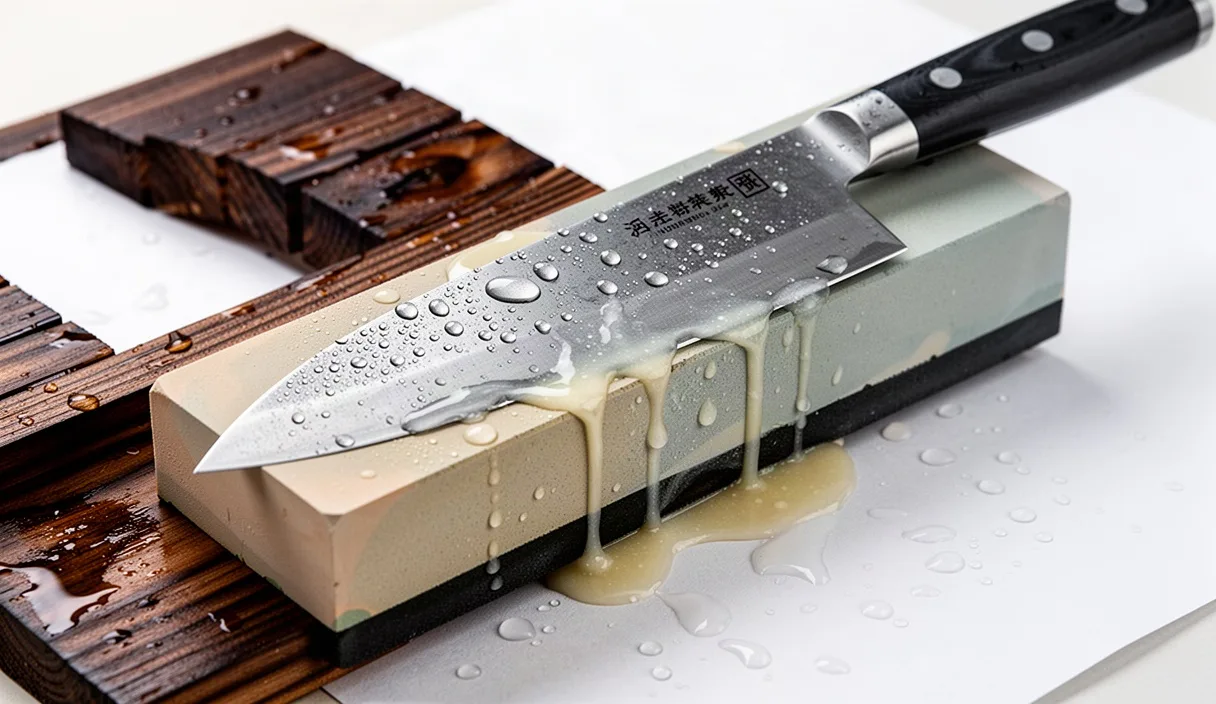
Before steel touches mineral, the stone must be properly lubricated. Water stones fall into two distinct manufacturing styles: soaking stones and splash-and-go stones. Soaking stones, often made with softer resin or clay binders, are porous and must be submerged in a vessel of clean, room-temperature water until all air bubbles cease to rise to the surface. This typically requires twelve to twenty minutes. Splash-and-go stones, which rely on denser glass or vitrified ceramic matrices, absorb almost no moisture; they require only a sprinkle of surface water before use.
Submerging a splash-and-go stone can soften its binder and lead to crumbling, while running a soaking stone dry will instantly glaze the surface with swarf, which is the paste of metal shavings that clogs the pores. We keep a spray bottle filled with tap water beside the sharpening pond. As we work, friction and air dry the surface out. When we notice the blade dragging dryly against the mineral block, we mist the stone lightly to maintain a wet contact surface.
As we pass the knife back and forth across the stone, the binder breaks down under pressure, releasing fresh, sharp abrasive particles that mix with water and metal swarf to form a creamy mud called slurry. Many beginners make the mistake of washing this mud off every few strokes. We leave this paste on the surface. The slurry cushions the blade, distributes the cutting force evenly across the bevel, and accelerates metal removal. If the stone lacks natural slurry formation, we rub a small conditioning stone, known as a nagura, in tight circles along the wet surface before sharpening to bring up a consistent working paste.
Locking the Wrist to Maintain Steady Bevel Angles
The single greatest obstacle in freehand sharpening is maintaining a uniform angle between the blade face and the flat stone. If the angle wanders from twelve degrees up to twenty degrees within a single pass, the apex becomes rounded rather than planar. A rounded edge may cut for a short time, but it lacks genuine keenness and wedges inside dense foods.
To lock the angle, we grip the knife handle firmly with our dominant hand, placing our index finger along the spine of the blade to stabilize the tool from rocking. The thumb rests against the heel or the flat of the blade face. Our non-dominant hand places the pads of two or three fingers directly on the primary bevel, within five millimeters of the cutting edge. These secondary fingertips provide downward pressure and feed tactile information to our hands, telling us whether the bevel sits flat against the stone.
- Place the stone on a non-slip rubber base or a wooden sink bridge to prevent shifting during strokes.
- Find the target angle by resting the blade flat on the stone, then raising the spine until the gap beneath the spine equals roughly two pennies stacked together, which produces an angle near fifteen degrees.
- Lock the dominant wrist completely. The movement of the stroke must come from our shoulders, elbows, and torso, not from flexing the wrist.
- Begin at the heel of the knife. Apply light, downward pressure only during the edge-trailing or edge-leading stroke, relieving pressure on the return pass to avoid scouring the edge.
- Work along the blade in three or four overlapping sections, moving from the heel through the middle belly, and out to the curved tip, adjusting finger placement to support each section directly.
When working the curved tip of a chef knife, the spine must lift slightly higher off the stone to keep the bevel angle consistent along the arc. We never twist the blade with our fingers to achieve this. Instead, we raise our elbow slightly as we sweep through the curve. Keeping our movements deliberate and repetitive ensures that the facets of the cutting edge remain crisp, straight, and flat from bolster to tip.
Feeling for the Burr Across the Edge Line
We do not move to a finer grit stone based on time or an arbitrary count of strokes. We move when the steel tells us it is ready, and that signal is the formation of a burr. A burr, also known as a wire edge, is a tiny lip of metal that curls over to the opposite side of the blade when the two bevels meet at a zero-radius point. If we have not raised a burr, we have simply ground down the shoulder of the bevel without actually apexing the cutting edge.
To check for the burr, we stop our work, rinse the blade clean, and slide the dry pad of our thumb across the blade face on the side opposite our grinding strokes. We move our thumb from the spine outward past the edge, never along the length of the edge, which risks deep cuts. If the steel has apexed, we feel a continuous, rough ridge of wire clinging to the far side. It feels like fine stubble or the snagging tooth of a zipper.
If we feel the burr only at the heel and the belly, but the tip feels smooth, we return to the stone and concentrate our strokes purely on the tip section. Once the burr is felt continuously from the heel to the very tip, we flip the knife over and repeat the exact same sharpening process on the opposite side. The second side takes fewer strokes, as we are simply meeting the new apex plane established by our initial work. When the second burr is fully raised, we perform several light, sweeping strokes alternating between sides to stand the wire edge upright and thin it down before progressing up the grit scale.
Stropping on Bare Leather to Polish the Apex
While fine stones refine the edge, microscopic fragments of the wire burr can remain tenuously attached to the apex, folding back and forth during kitchen prep. Stropping removes these weak micro-flaps of metal and polishes the absolute tip of the edge. We use a piece of thick, vegetable-tanned cowhide or horsebutt leather mounted on a flat hardwood block.
Unlike sharpening on a rigid water stone, stropping must always be done with trailing strokes. If we push the cutting edge forward into leather, the knife will dig into the hide, ruin the strop, and blunt the apex. We lay the blade flat on the leather, raise the spine to match the exact sharpening angle, and pull the knife backward toward the handle, sweeping from heel to tip in one continuous, fluid motion.
- Maintain minimal downward force during stropping; the weight of the blade itself is almost enough to establish contact.
- Keep the angle identical to, or slightly lower than, the water stone angle to avoid rounding the finished apex over the soft leather grain.
- Execute ten to twelve alternating strokes on each side of the blade, flipping the knife over the spine rather than over the cutting edge.
- Inspect the edge under a strong light source; a clean apex should show zero glinting reflections along its line.
We prefer bare leather for kitchen knives rather than leather charged with diamond or chromium oxide compounds. Diamond paste removes steel quickly, but it can easily round a delicate apex if pressure is uneven. Bare leather possesses just enough natural silicates and tooth to cleanly strip off the remaining foil burr while leaving the microscopic teeth formed by our medium-grit water stones intact and sharp.
Common Mistakes to Avoid
The most frequent error we encounter is allowing the water stone to become hollowed out or "dished." Over time, the middle of the stone wears away faster than the ends. Sharpening on a dished stone makes holding an accurate bevel angle impossible. We keep a diamond flattening plate nearby, scribbling pencil lines in a grid across the stone's surface before each session, and lapping the stone under running water until every pencil mark vanishes, ensuring absolute flatness.
Another common misstep is applying excessive downward force. Grinding hard does not speed up the process meaningfully; it merely flexes thin blade steel, accelerates stone wear, and causes hand fatigue. Light, rhythmic pressure allows the abrasive crystals to cut efficiently without gouging the mineral surface. Finally, never wipe slurry from the stone using dirty workshop rags that hold coarse grit, as stray coarse particles will cross-contaminate your finer finishing stones and leave deep scratches across your newly polished bevels.
Setting Up Your Workspace and Moving Forward
To begin freehand sharpening, you need only a sturdy surface, a double-sided 1000/3000 water stone, a rubber stone holder, and a flat leather strop. Set up near a sink or with a shallow tub of water at your side. Wear an apron to protect your clothes from dark mineral swarf, and keep a clean cotton towel within reach to dry blades for frequent tactile inspection.
Sharpening by hand is a quiet, restorative discipline that returns control over your cooking tools back into your hands. Take an older, inexpensive knife to practice finding your bevel angle and raising your first deliberate burr. Pay close attention to the sound of the stone, the color of the slurry, and the resistance under your fingertips. When a knife suffers from severe structural damage, such as a bent tip, severe heat damage, or deep chips extending beyond three millimeters into the blade road, consider seeking out a professional smith or restoration service with power-cooled platen grinders to re-profile the geometry before returning the knife to your bench for hand maintenance.